

Planting your Erythronium bulbs
The bulbs you receive should be planted as soon as you are able to and kept moist at all
times. Most will flower during the Spring following planting, the odd one may take a
year longer.
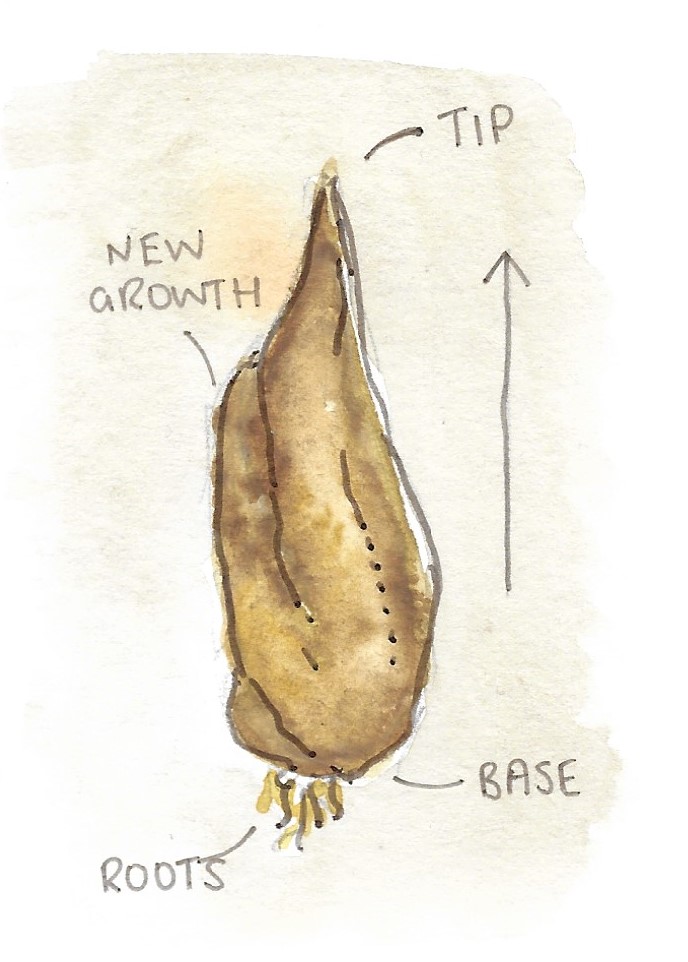
Most Erythronium bulbs have an obvious tip which may still have
the leaf sheath attached and this is the top of the bulb. The base is
rounded, and often creamy-white and smooth. Please be aware
that roots often appear on the side of the bulb rather than from the
bottom.
How to plant
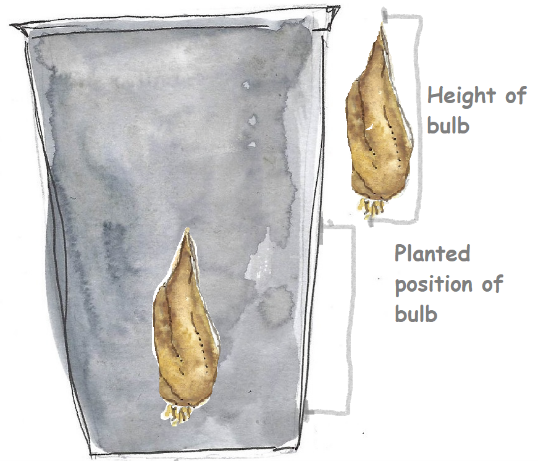
Plant each bulb to a depth that is at least double the
bulb’s length, making a hole that is twice the length of the
bulb, and placing it at the bottom. Try and ensure it is
kept upright whilst covering with soil.
Planting in Pots
Use well drained compost with plenty of organic matter. Potting compost with some
grit, perlite or bark added to open up the compost works well.
Plant in deep pots if possible – the bulbs, once planted, will work their way deeper in
time. Keep the compost damp and roots will develop in late summer / autumn and
leaves appear from early March onwards. Protect from slugs and keep in a cool shady
place. Protect from frost with fleece or similar.
Planting in open garden
Erythronium in the wild often grow where it is cool with light dappled shade. Prepare soil
well with added organic matter. Old compost or leaf mould is ideal as an additive.
Apply surface mulch of organic material and protect from slugs from late February
onwards.